Fuel Locker
In front of the pilothouse console will be a locker to house a pair of 19-gallon saddle tanks. The locker will also serve as seats.
 |
| Fuel locker sides clamped for interior fillets |
 |
| Exterior corners rounded sanded and taped with 6-oz fiberglass |
 |
| Select pipe used for rim of fuel locker lid |
 |
| Glassing edges of plywood on fuel locker lid |
 |
Fuel locker in about its final
location. Ready for fillet and
taping to bottom then varnishing. |
 |
| Fuel locker epoxied to dech with 17oz biax inside and out |
 |
Interior of the fuel locker with brackets for the
fuel tanks and vents for bulkhead spaces
below the deck. |
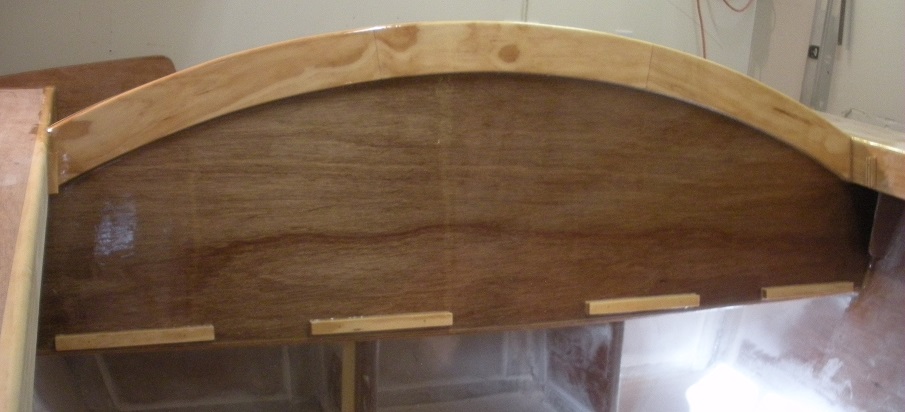
I did not like the flat lid for the fuel locker so I rebuilt it with a curve to match the pilothouse curved roof.
 |
Members for the curved fuel locker lid glassed and
ready for assembly |
 |
Members for the curved fuel locker lid assembled
as a frame |
 |
| Curved fuel locker lid glued to frame |
 |
| Inside of curved fuel locker lid varnished |
 |
| Inside of curved fuel locker lid varnished |
 |
Four coats of varnish on the fuel locker lid.
|
 |
Fuel tanks installed. Although not compliant,
this installation is temporary until I
decide how far fore/aft I want the fuel tanks. |
I installed the world's best fuel level gauges.
They need no power.
They require no wiring.
They never fail.
They always read exactly correct.
Just open the fuel locker lid...
And look at the fuel level.

Rear Bench Seat
There will be a fold-up bench seat along the slopwell bulkhead.
 |
Glassing the select pine
frame pieces |
 |
| Laminating 9mm meranti to the select pine frame pieces |
 |
Epoxying the 12mm meranti panel into the
select pine frame |
 |
| Glassing the rounded edge of the select pine frame |
 |
| Filling the weave |
 |
| Installing 18mm meranti center beam |
 |
Blocks, to support the back of the bench, installed
along bottom of slopwell bulkhead |
 |
| Applying glass tape to the edges of the bench-front support blocks |
 |
Laminating two layers of 18mm meranti together the create
the bench-front support blocks |
 |
| Glassing the bench-front support blocks |
 |
Reinforcing for the hull side panels where the
bench-front support blocks will be installed |
 |
| Bench-front support block ready for installation |
 |
| Dry fit to determine location of the bench-front support blocks |
 |
Bench-front support block glued to side panel
and clamped with temporary screws |
 |
| Bench-front support block glued installed |
 |
| Bench bottom being varnished |
Non-Skid
Been trying different ideas for clear non-skid surface on bright-work. Found this product "Seymour Good Grip" at Lowes web site and ordered some.
Tried it on a test varnished panel.
 |
| Good Grip on varnished test panel |
On the plus side, it is definitely clear and after curing it is non-skid and seems hard to scratch. Unfortunately it takes the gloss off and leaves an eggshell finish. But I guess that should be expected in an non-skid surface. I would probably use it except....
As soon as I sprayed it on, some areas immediately started to peel/flake before drying and remained that way after drying.
 |
| Good Grip peeling/flaking |
And the Lowes website did not mention what it says on the can, "Recoat every few months."
I don't think this is my solution for a clear non-skid surface on bright-work.
Varnish and Paint
I hate sanding. But it's gotta happen to smooth out the lumps and remove the sheen from the epoxy wherever varnish or paint will be applied.
 |
| Sanded hull interior |
 |
| Four coats of varnish on the sheer and rails |
 |
| Varnish on the fuel locker and hull side panels |
 |
| One coat of Pettit Easypoxy Bright Work Brown Gloss on the deck |
 |
| One coat of Pettit Easypoxy Bright Work Brown Gloss on the deck |
 |
| One coat of Pettit Easypoxy Bright Work Brown Gloss on the deck |
Mechanical Installations
Cables are routed from the console to the transom, above deck, with no deck penetrations.
 |
| Cable routing above deck. |
 |
| Cables at transom end |
 |
Completed console. I am not a huge fan of bling (chart plotters
fuel, tilt, voltage gauges, radios, etc). All I like to see are
the tachometers. |
 |
| Cables inside 2-inch split wire loom |
 |
| Brass cleats, three along each sheer deck |
On to the Trailer
 |
| Canola oil on the bunks helped the boat slide. |
 |
| ¼-inch laminated safety glass installed |
Off of the Trailer
Looks like the old trailer is too short. Even with the axle as far back as possible, when I install the outboards there will not be enough tongue weight. Time for a new trailer that can handle the new, longer boat.
 |
| Run lines from the bow loop to a tree at the stern |
 |
Use the car to pull the old trailer out from under her, placing
tires under her as I go. |
 |
| Resting on tires waiting for the new trailer |
This is a great way to test the strength of the new boat, yanking it on and off trailers, in the dry, a couple of times.
Back on to the Trailer
Got the new trailer. A single axle 3100-pound capacity King galvanized trailer.
 |
| Starting to wench her on to the new trailer |
Just a little canola oil on the bunks to help the boat slide on.
 |
| A little further |
 |
| Almost there |
 |
| Once she comes level the winching gets easier. |
Mounting the Motors
Built my own engine lift to move the old Honda 50Hp 4strokes from the old Lady C to the new boat.
Ready for a test float!!


No comments:
Post a Comment
Note: Only a member of this blog may post a comment.